


Git is the most popular version control in the software industry. It is an open-source project developed by the father of Linux, Linus Torvalds. As a new developer, you will benefit from using it. Open-source and commercial projects use it to manage their source code. It is one tool that you need in your software development tools arsenal. It will allow you to collaborate remotely with your team, contribute to open-source software projects and build your developer portfolio. In this blog post, I will take you through the basics of git. We will use Github, a cloud-based hosting service that helps you manage git repositories, to host our react.js project.
To create a react project, we need to install node.js and npm on our local machine. Go to this website to download node.js. when you install node.js, npm will be installed too. Use the command node -v or npm -v to check the version of node and npm respectively.
Here is a step by step guide to create your project:
- In your cmd/terminal, navigate to the folder where you want to store your project.
- Run npx create-react-app my-react-app. (You can replace my-react-app with the name of your app).
When your project has finished installing, you will have a file structure that looks like this:
my-react-app ├── README.md ├── node_modules ├── package.json ├── .gitignore ├── public └── srcsrc └── Components └──Homepage ├── Homepage.js └── Homepage.css
Now that we have the basic file structure ready we can upload our project to github.
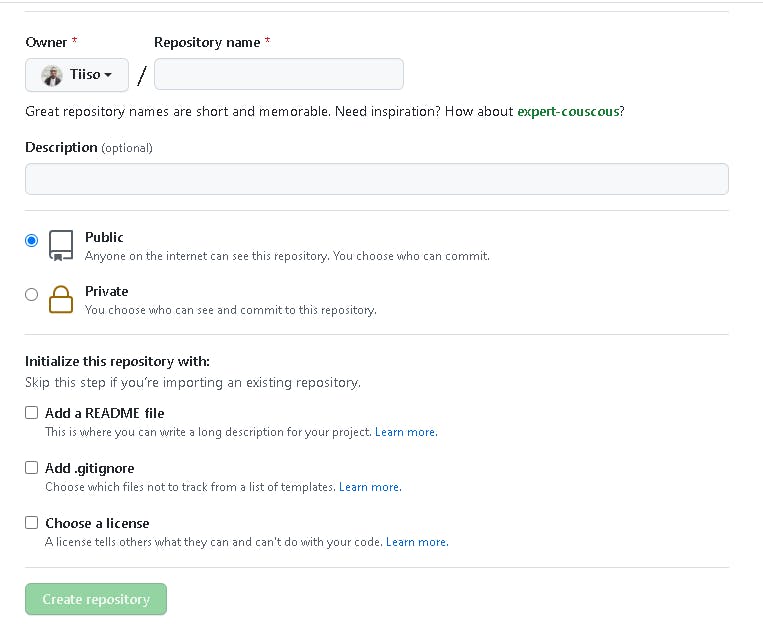
Create a new repository on Github
- In your browser go to github (github.com), navigate to your dashboard then click on the repositories tab. Click on the green button labelled New to create a new repo.

- You will be presented with the following screen where you will choose a name for your repo, whether you want it to be public or private, and the optional files to include in your repo. Click on create a repository to finalize the setup.
Initialize git on your local machine and upload your code to the remote repo.
- Navigate to your react app folder and initialize git
cd my-react-app
git init
Now we add our files to the staging area
git add .Notice the space between add and the period.
Check if your files are added.
git status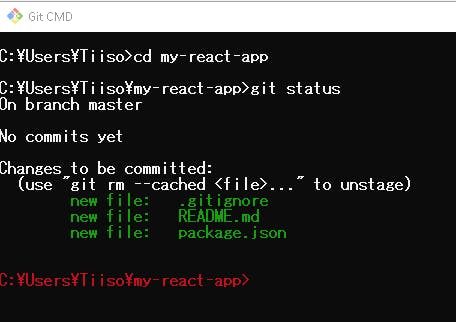
- Add the latest changes to the source code.
git commit -m "initial commit" - Switch to the branch you want to commit your changes to. In this example we will use the master branch.
git branch -M master - Add files to your remote repo
git remote add origin https://github.com/USER/PROJECTNAME.git - Push your changes to your remote repo
git push -u origin master